

Resources
In the Resources tab you see an overview of all created resources. ↗ Open in Locaboo
Use the + Add button to create a new resource, or Edit to modify an existing one.
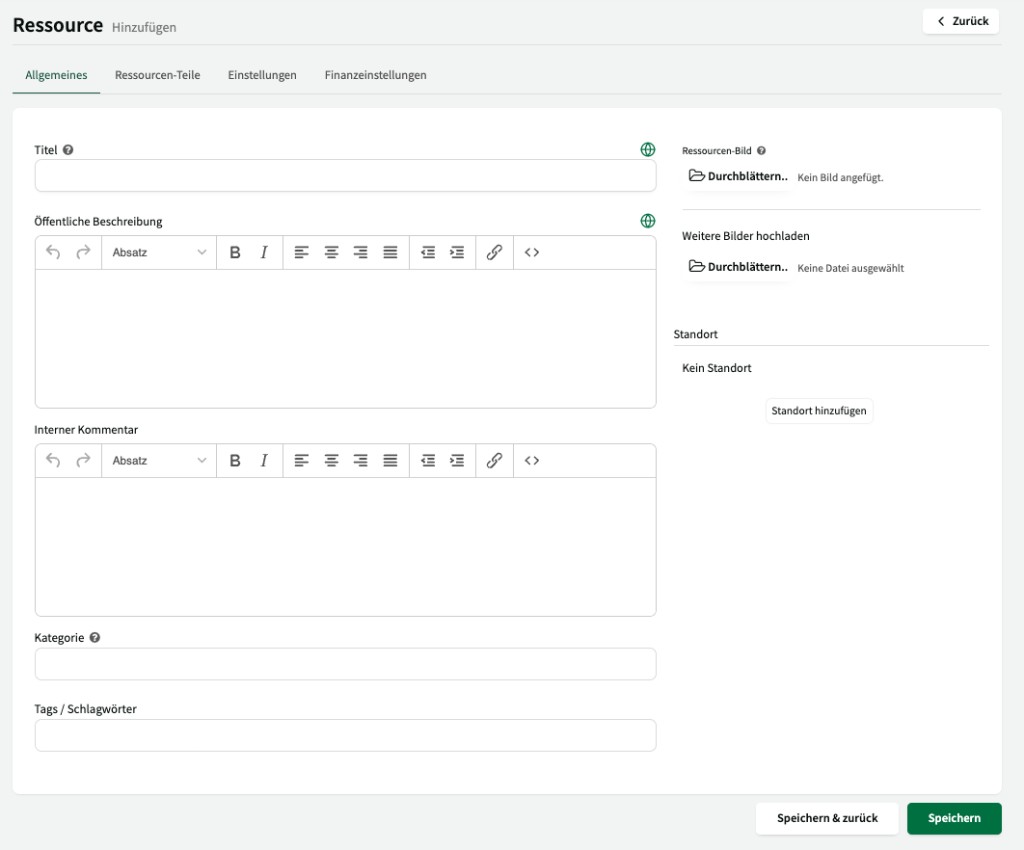
Creating and Editing a Resource
Section titled “Creating and Editing a Resource”When creating or editing a resource, the following fields are available:
| Field | Description |
|---|---|
| Title | The name of the resource (e.g. “triple gym hall”). |
| Description | Free text that helps customers understand the resource – e.g. what is available on site. |
| Internal Comment | A note visible only to internal users. |
| Categories | Predefined or custom categories for sorting. Relevant for the booking platform; no internal impact. |
| Keywords / tags | Additional search terms for the booking platform. No internal impact. |
| Main Image | A cover image for the resource. |
| Additional Images | Extra images for the detail view. |
| Location | Address, phone number and contact person. You decide whether this information should be publicly visible. |
Partial resources
Section titled “Partial resources”In the Resource Parts tab you define how many parts a resource has. A typical example is a triple gym hall with hall thirds 1, 2 and 3.
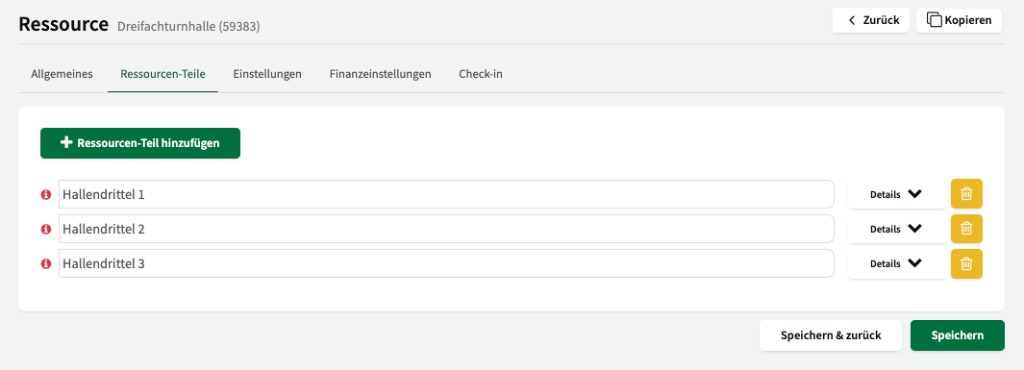
Partial resources matter because:
- Opening hours always apply to the main resource.
- Tariffs can differ per partial resource.
- Booking rules should be created for both the main resource and the partial resources.
Categories
Section titled “Categories”In the Categories tab you manage the categories you can assign to your resources. Some categories are predefined by the system; you can also create your own categories.
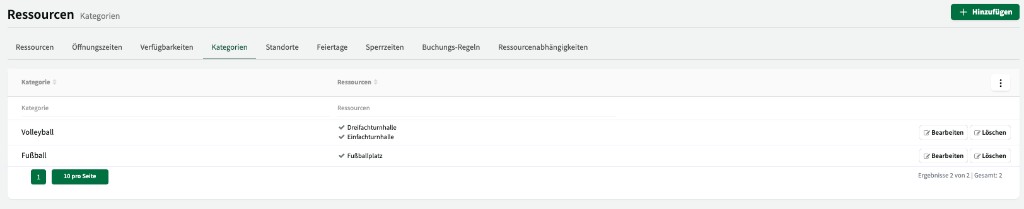
Categories primarily serve as a sorting and filtering function on the booking platform. Internally they have no impact on functionality.
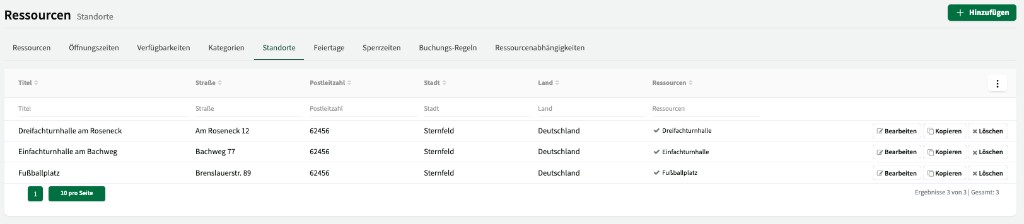
Locations
Section titled “Locations”In the Locations tab you create locations centrally and then assign them to individual resources. For each location you can store an address, phone number and contact person.
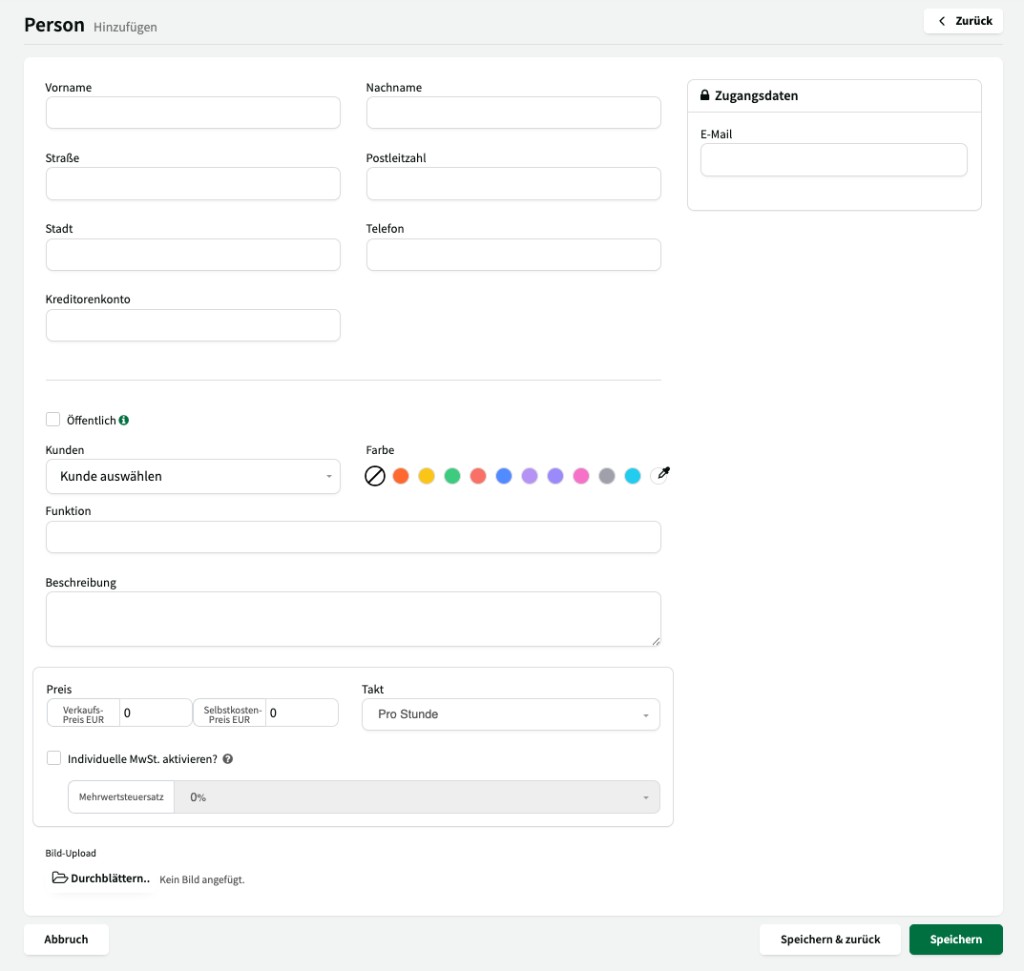
Persons
Section titled “Persons”In the Persons tab you manage people who can be assigned to bookings – e.g. instructors, trainers or coaches.

Use + Add to create a new person with name and contact details. The people you create are then available for selection in the booking sidebar under the General tab.
Check-In (digital hall book)
Section titled “Check-In (digital hall book)”Digital check-in replaces physical hall books and enables complete documentation of the actual use of your resources.
In the Check-In tab of a resource you enable and configure the check-in feature.
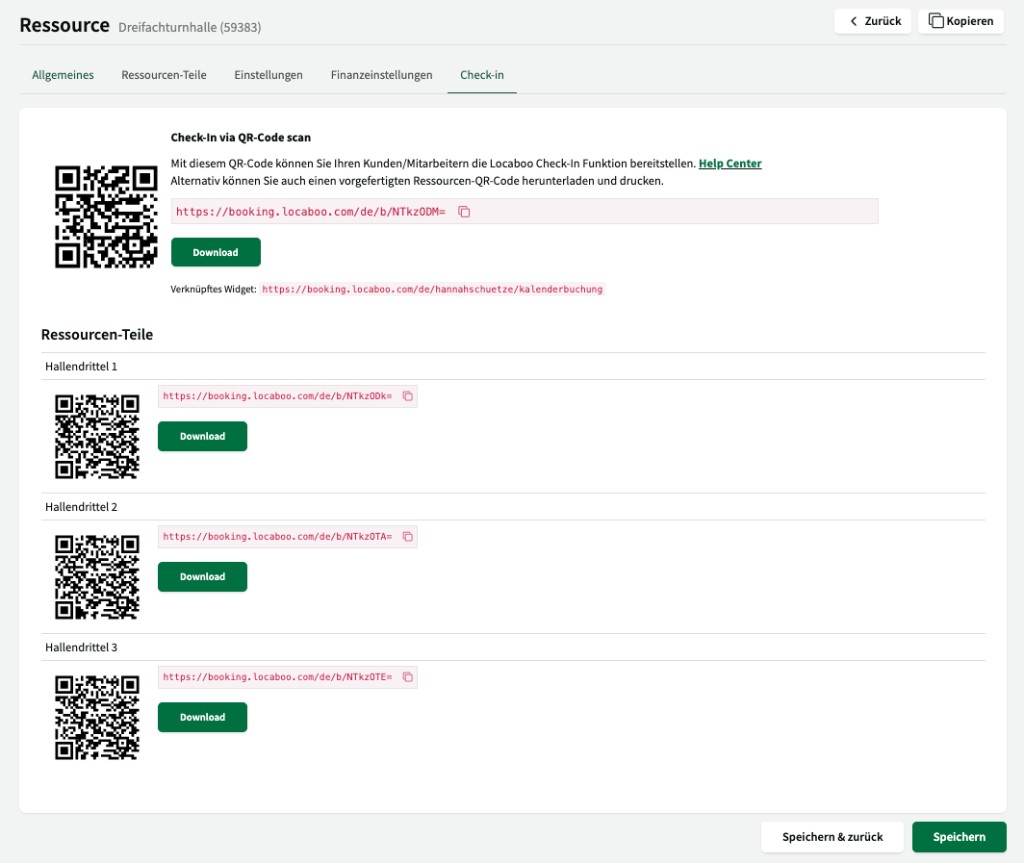
How check-in works
Section titled “How check-in works”- Activation: Enable check-in in the Check-In tab of the relevant resource.
- QR code: Locaboo generates a permanent QR code per resource. Print it and display it at the entrance to the resource.
- User check-in: Users scan the QR code with their smartphone and confirm their attendance.
The check-in toggle is shown per booking in the booking sidebar and can also be enabled or disabled per individual booking instance.
Optional settings
Section titled “Optional settings”| Setting | Description |
|---|---|
| Lead time | Defines from when check-in is possible (e.g. 1 hour before the booking starts). |
| GPS check | Checks the user’s location at check-in. Check-in is only possible if the user is within approx. 200 metres of the stored location of the resource. Prerequisite: The location must be stored correctly under General > Location. |
| Custom fields | Via custom fields, additional data can be captured at check-in – e.g. the actual number of participants or confirmation of hall rules. |
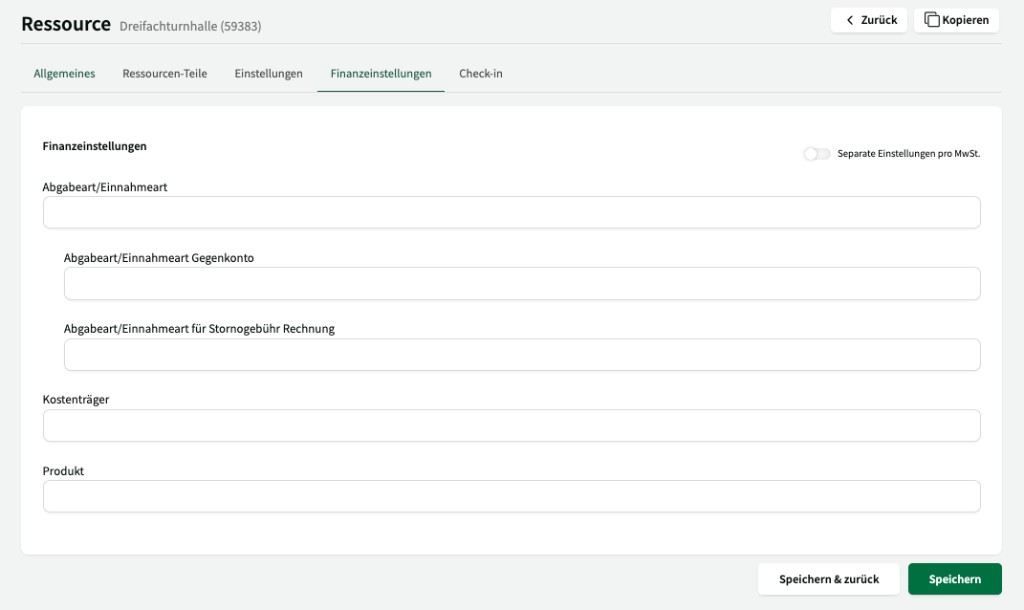
Financial settings
Section titled “Financial settings”In the Financial settings tab of a resource you store resource-specific financial data – e.g. cost centres or account numbers relevant for billing.
Settings per resource
Section titled “Settings per resource”In the Settings tab of a resource you specify whether the resource should be available on the booking platform or used only internally.
