

Booking sidebar
The booking sidebar opens when you create a new booking or edit an existing one. You reach it via the + Add booking button in the calendar, by clicking a free time slot, or by clicking an existing booking.
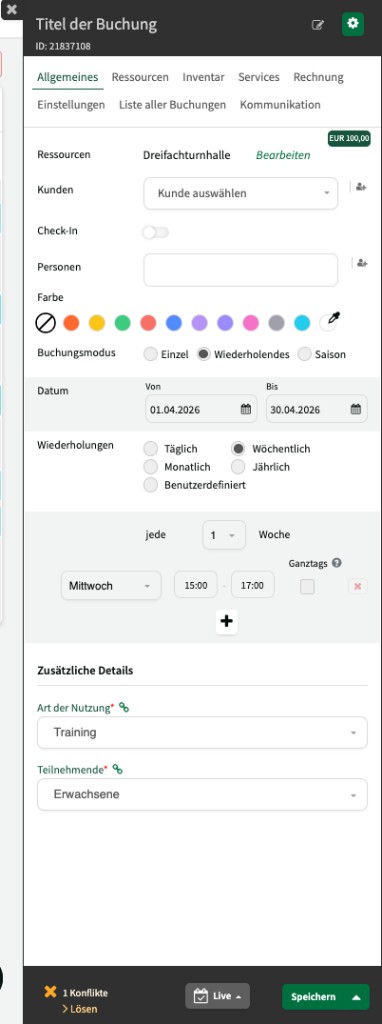
The sidebar is organised into several tabs and a footer with status, conflicts, and save options.
Header
Section titled “Header”In the header you enter the booking title (optional). For existing bookings, the unique booking ID is shown below the title.
Use the pencil icon to edit the title. The gear icon opens a menu with further actions:
- Delete booking
- Copy booking
- Show change history
- Export calendar file (ICS)
The current booking price is shown at the top right.
General
Section titled “General”The General tab contains the main booking data:
- Resources – the resources assigned to the booking. Use the Edit link to go straight to the Resources tab.
- Customers – select the customer to assign to the booking. Use the icon on the right to quickly create a new customer.
- Check-in – turn on the check-in switch if check-in should be recorded for this booking.
- People – assign one or more people (e.g. instructors, trainers) to the booking.
- Colour – choose an individual colour for the booking. If none is selected, the customer or customer group colour is used.
Booking mode – you have three options:
| Mode | Description |
|---|---|
| Single | A one-off booking for a given period. Can span multiple days or be all-day. |
| Recurring | A series booking with start and end date. Interval: daily, weekly, monthly, yearly, or custom. |
| Season | Like a recurring booking, but start and end dates are taken automatically from the season settings. |
For recurring bookings you set start date, end date, interval, and desired weekdays with times. Under Custom you can add any number of individual dates manually.
Under Additional details the custom fields you configured for the resource are shown (e.g. type of use, participants).
Resources
Section titled “Resources”
On the Resources tab you select the resource the booking belongs to. If your resource has sub-resources (e.g. thirds of a triple gym), you can select specific parts here.
Use + Select additional resources to add more resources for a multi-resource booking, where allowed by availability.
Inventory
Section titled “Inventory”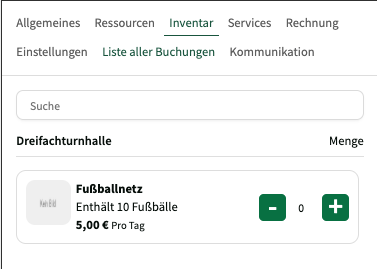
On the Inventory tab you see the available equipment for the selected resource (e.g. football net). Use the + and - buttons to set the quantity. Price, billing unit (e.g. per day), and description are shown.
Use the search field to find specific inventory.
Services
Section titled “Services”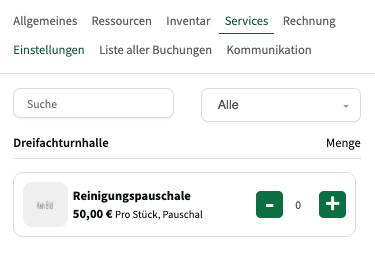
On the Services tab you add extra services to the booking (e.g. cleaning flat fee). As with inventory, set the quantity with the + and - buttons. Price and billing type are shown per service.
Use the All dropdown to filter services by category.
Invoice
Section titled “Invoice”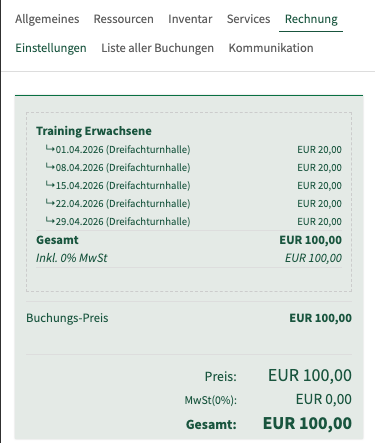
On the Invoice tab you see an overview of all costs for the customer. The breakdown shows:
- individual booking instances with date, resource, and line price
- the total amount including VAT calculation
- the booking price as a summary
If invoices have already been created for this booking, they are listed here too and can be downloaded.
Settings
Section titled “Settings”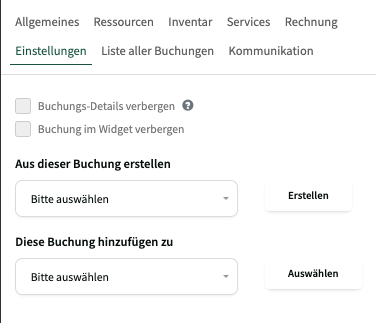
On the Settings tab you configure visibility and links for the booking:
- Hide booking details – overrides existing settings and hides booking details in widgets.
- Hide booking in widget – excludes the booking completely from widget display.
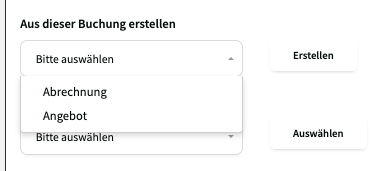
Create from this booking – create billing or a quote directly from the booking.
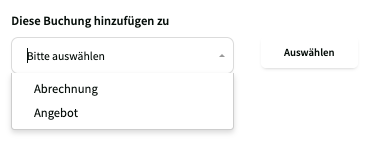
Add this booking to – add the booking to existing billing or an existing quote.
List of all bookings
Section titled “List of all bookings”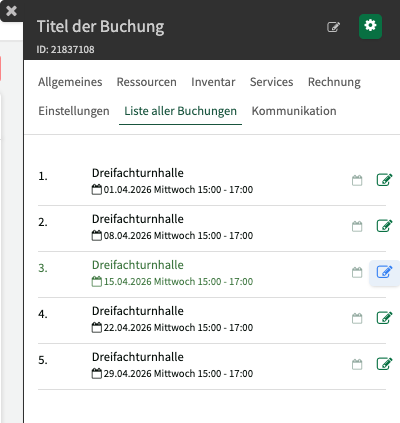
On the List of all bookings tab you see all instances of a recurring or season booking. Each instance shows resource, date, weekday, and time.
For each instance you have two actions:
- Edit (pencil icon) – opens the detail view for that booking instance.
- Cancel (bin icon) – deletes the single instance. You can optionally notify the customer.
Edit booking instance
Section titled “Edit booking instance”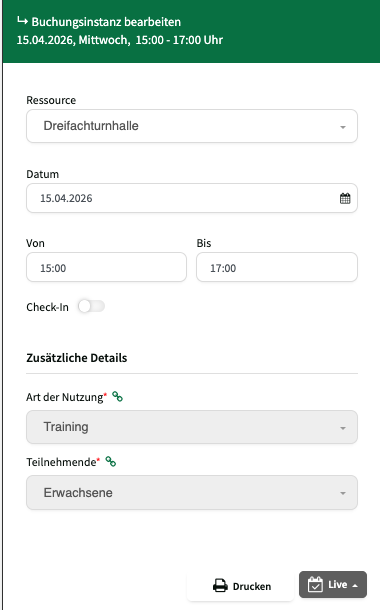
In the detail view of a single booking instance you can change:
- Resource – assign the instance to another resource
- Date – move the instance to another date
- From / To – adjust the time
- Check-in – enable or disable check-in for this instance
- Additional details – adjust custom fields for this instance
Use Print to print the booking instance.
Communication
Section titled “Communication”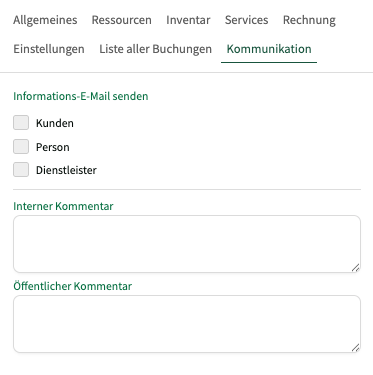
On the Communication tab you define who is notified when the booking changes:
- Send information email – use the checkboxes to choose whether customers, people, and/or service providers receive an email.
- Internal comment – a note visible only to users.
- Public comment – a note that may be visible to customers depending on visibility settings.
Booking status
Section titled “Booking status”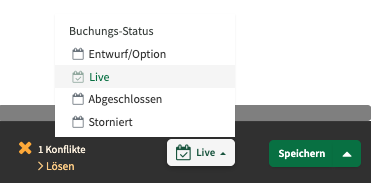
In the sidebar footer, use the status dropdown to set the current booking status:
| Status | Description |
|---|---|
| Draft/option | The booking is being planned and is not yet visible in widgets. |
| Live | The booking is active and visible. |
| Completed | The booking is completed. This status is set automatically after an invoice is created. |
| Cancelled | The booking was cancelled. |
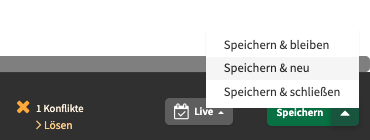
Use the green Save button and its dropdown to choose what happens after saving:
| Option | Description |
|---|---|
| Save & stay | The booking is saved and the sidebar stays open. |
| Save & new | The booking is saved and a new, empty booking opens. |
| Save & close | The booking is saved and the sidebar closes. |
Conflicts in the booking sidebar
Section titled “Conflicts in the booking sidebar”When creating or editing a booking, Locaboo checks for conflicts in the background. If conflicts are found, the footer shows the number of conflicts and a > Resolve link.
Click > Resolve to open the conflict list inside the sidebar. For each conflict you see details (date, resource, type of conflict) and can choose a resolution from a dropdown.
For holiday / closure three options are available:
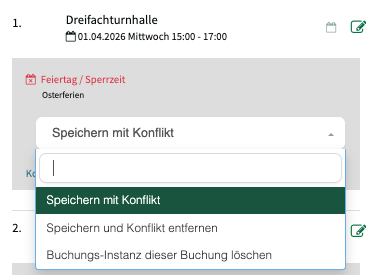
- Save with conflict – the booking is saved; the conflict remains and stays shown.
- Save and remove conflict – the booking is kept; the conflict status is cleared.
- Delete booking instance of this booking – the affected booking instance is deleted.
For a booking overlap a fourth option is available:
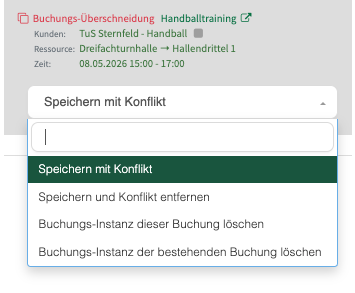
- Delete booking instance of existing booking – the existing overlapping booking is deleted.
Resolve conflicts manually
Section titled “Resolve conflicts manually”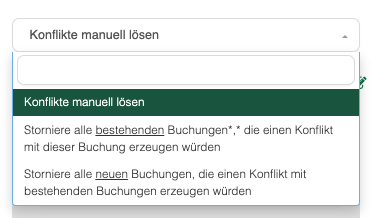
Alternatively to resolving one by one, you can handle conflicts via the Resolve conflicts manually dropdown:
- Resolve conflicts manually – resolve each conflict individually via the dropdown options (default).
- Cancel all existing bookings that would conflict with this booking – all overlapping existing bookings are cancelled automatically.
- Cancel all new bookings that would conflict with existing bookings – all new instances that cause conflicts are removed automatically.
After you choose a resolution and click Save, a confirmation dialog appears:
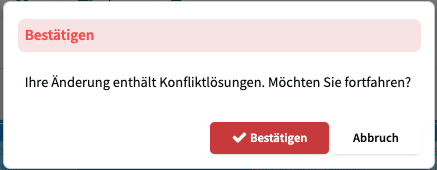
If the conflict resolution deletes existing bookings, you can notify the affected customers about the cancellation.